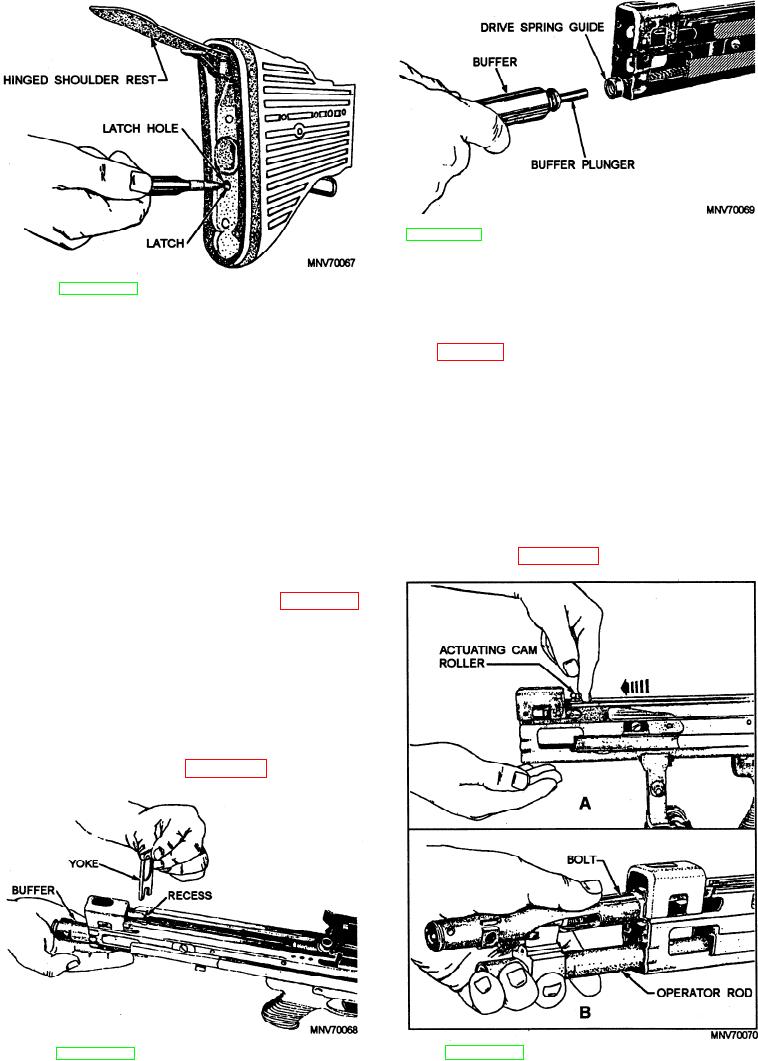
Figure 2-56.--Separating the buffer from the drive spring
guide.
Figure 2-54.--Releasing the stock latch.
buffer slowly. Allow the drive spring to expand until the
end of the drive spring guide is exposed at the rear of the
assembly, all disassembly can be done with a driftpin or
receiver. Pull the buffer plunger from the drive spring
a similar pointed object.
guide (fig. 2-56).
General disassembly begins with the bolt forward,
REMOVING THE OPERATING GROUP.--
the cover closed, and the safety on SAFE. Before you
The operating rod assembly group consists of the
begin disassembling the weapon, inspect it thoroughly
operating rod, the drive spring, the drive spring guide,
to make sure it is unloaded. As you disassemble the
and the bolt assembly. To remove the group, pull the
weapon, place the parts (in the order in which you
drive spring guide and spring from the receiver and
remove them) on a clean, flat surface. This reduces the
separate them. With the left hand, grasp the pistol grip
possibility of losing some of the parts and will aid you in
and pull the cocking handle to the rear until the bolt is
reassembling the weapon. When you reassemble the
separated from the barrel socket. Continue to pull the
weapon, replace the parts in reverse order.
operating rod and bolt to the rear by pulling the cam
roller as shown in figure 2-57, view A.
REMOVING THE STOCK.--To remove the
stock, raise the hinged shoulder rest and insert the nose
of a driftpin into the latch hole as shown in figure 2-54.
With the latch depressed, remove the stock by pulling it
directly to the rear.
REMOVING THE BUFFER GROUP.--The
buffer assembly group consists of the buffer yoke and
the buffer. To disassemble the group, hold the palm of
your hand against the exposed buffer and press the
buffer lightly. Remove the buffer yoke from the top of
the receiver as illustrated in figure 2-55. Withdraw the
Figure 2-57.--Removing the operating group.
Figure 2-55.--Removing the buffer group.
2-30

