pivot point. When the two legs look about as far
away from the mark as the third one and all three
are about equally spaced, you lower the two legs
and press them into the ground. Make any slight
adjustment to level the head further by moving
the third leg a few inches in or out before pressing
it into the ground.
On smooth or slippery paved rock surfaces,
you should tighten the tripod legs hinges while
setting up to prevent the legs from spreading and
causing the tripod to fall. You should make use
of holes or cracks in the ground to brace the
tripod. In some cases, as a safety factor, you
should tie the three legs together or brace them
with rock or bushes after they are set to keep them
from spreading. If setups are to be made on a
slippery finished floor, rubber shoes may be fitted
to the metal shoes, or an equilateral triangle leg
retainer may be used to prevent the legs from
sliding.
When you are setting up on steeply sloping
ground, place the third leg uphill and at a greater
distance from the mark. Set the other two legs
as before, but before releasing them, check the
stability of the setup to see that the weight of the
instrument and tripod head will not overbalance
and cause the tripod to slip or fall.
Proper care must be observed in handling the
tripod. When the legs are set in the ground, care
must be taken to apply pressure longitudinally.
Pressure across the leg can crack the wooden
pieces. The hinge joint should be adjusted and not
overtightened to the degree that it would cause
strain on the joint or strip or lock the metal
threads. The machined tripod head is to be kept
covered with the head cover or protective cap
when not in use, and the head should not be
scratched or burred by mishandling. When the
tripod is in use, the protective cap is to be placed
in the instrument box to prevent it from being
misplaced or damaged. Any damage to the
protective cap can be transferred to the tripod
head. Mud, clay, or sand adhering to the tripod
has to be removed, and the tripod is to be wiped
with a damp cloth and dried. The metal parts
should be coated with a light film of oil or wiped
with an oily cloth. Foreign matter can get into
hinged joints or on the machined surfaces and
cause wear. Stability is the tripod’s greatest asset.
Instability, wear, or damaged bearing surfaces on
the tripod can evolve into unexplainable errors in
the final survey results.
Range Pole
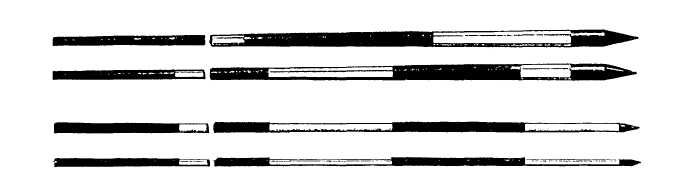
A range pole (also called a lining rod) is a
wood or metal pole, usually about 8 ft long and
about 1/2 to 1 in. in diameter; it is provided with
a steel point or shoe and painted in alternate bands
of red and white to increase its visibility. Figure
11-39 shows a variety of range poles. The range
pole is held vertically on a point or plumbed over
a point, so the point may be observed through
an optical instrument. It is primarily used
as a sighting rod for either linear or angular
measurements. For work of ordinary precision,
chainmen may keep on line by observing a range
pole. A range pole may also be used for
approximate stadia measurement.
Plumb Bob, Cord, and Target
A plumb bob is a pointed, tapered brass or
bronze weight that is suspended from a cord for
the general purpose of determining the plumb line
from a point on the ground. Common weights for
Figure 11-39.-Range poles.
11-39