
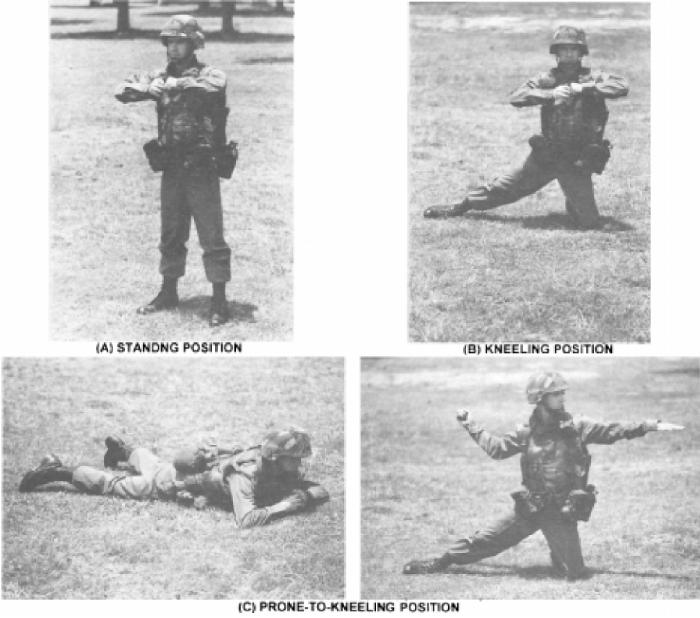
Figure 12-11.--Throwing positions.
view A). Remove the safety pin with a pulling,
target. Release the grenade somewhere forward of
twisting motion. If the situation permits, you should
your body and in your general field of vision (fig. 12-
observe removal of the safety pin.
10, views B and C). In this way you take advantage
of the hand-and-eye coordination inherent in most
people.
NOTE
5. Follow through on your throwing motion
When the safety pin cannot be pulled out,
beyond the point where you released the grenade (fig.
shorten the distance between the legs of the
12-10, view D). This follow-through improves
safety pin to aid in its removal. However, if
distance and accuracy and relieves the strain on your
the grenade is not used, spread the legs of the
throwing arm.
safety pin for safety in carrying.
6. When available, duck behind cover to avoid
being hit by fragments of the grenade. When no cover
3. As you remove the safety pin, immediately
is available, drop to the prone position with your
look toward your target.
helmet facing in the direction of detonation.
4. Throw the grenade with an overhead throwing
Although proper positioning techniques of
motion, keeping your eyes trained at all times on the
throwing hand grenades are usually stressed during
12-6