sharper the curve, the more points you need) and
by drawing in shorts steps.
Figure 3-10 shows how a smooth line is drawn
through a series of plotted points. The french
curve in view A matches points 1, 2, 3, and 4.
Draw a line from 1 to 3 only (not to 4).
At B, the curve matches points 3 to beyond
4. Draw a line from 3 to 4 only (not to 5).
At C, it matches points 4, 5, and 6. Draw a
line from 4 to just short of 6.
At D, it matches a point short of 6 to beyond
7. Draw a line from 6 to 7.
At E, it matches a point short of 7 to beyond
9. Draw a line from 7 to 9.
At F, it matches a point short of 9 to beyond
11. Draw a line from 9 to 11.
You will probably notice how the french curve
is turned over and reversed to find portions that
fit the points on the line with increasing or
decreasing changes in curvature.
When you are drawing a curved line that
extends into a straight line, the curve should be
drawn first, and the straight line joined to it.
USE OF DRAFTING TEMPLATES
Drafting templates should be used only when
accuracy can be sacrificed for speed. Circles or
arcs, for example, can be drawn more quickly with
a template than with a compass. Templates must
be used properly to be effective.
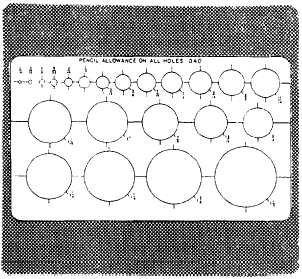
To draw a circle with the circle template (fig.
3-11), lay out center lines on the drawing where
Figure 3-11.-Use of the circle template.
the circle is to be drawn. Then place the correct
circle opening over the center line so that the
quadrant lines on the template coincide with the
center lines on the paper. Draw the circle, using
a sharp, conical point on the pencil. Allowance
must always be made for the width of the pencil
line in placing the template opening in the right
position on the drawing.
To draw an arc, lay out tangent lines on the
drawing. Then place the correct size circle of the
template on the paper so that the template
quadrant lines coincide with the tangent lines, and
draw the arc.
When using a template, you must hold it down
firmly to keep it from slipping out of position.
Figures or circles from the template must be
drawn with the correct line weight on the first set-
ting as it is difficult to reset the template in the
exact position.
USE OF THE DIVIDERS
As we stated in chapter 2, dividers are used
to transfer measurements, to step off a series of
equal distances, and to divide lines into a number
of equal parts. Dividers are manipulated with one
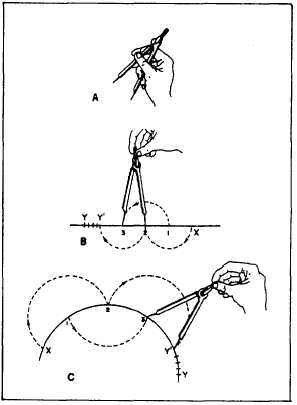
hand. In setting dividers (fig. 3-12, view A), hold
Figure 3-12.-Use of the dividers.
3-9


